5 Nail Prep Mistakes That Ruin Gel Service Wear Time
Quick Answer: What Causes Gel Services to Lift Early?
The five most common nail prep mistakes are over-buffing the natural nail, leaving oil or moisture on the plate, applying dehydrator too early in the appointment, skipping primer, and touching the prepared nail surface before base coat application. Each error creates a specific adhesion failure pattern.
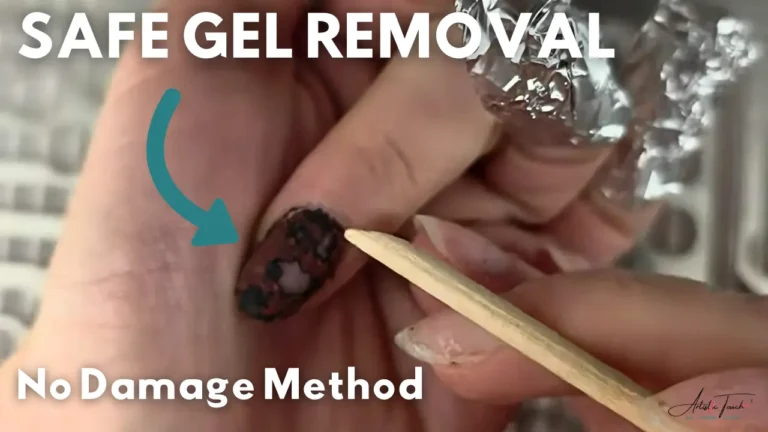
The Nail Prep Course demonstrates how to identify which prep mistake is causing your lifting pattern and provides the correct technique for each step of the preparation sequence.
Why Perfect Application Still Lifts
Gel services lift at the free edge, sidewalls, or cuticle area within three to seven days when nail prep contains errors, even when base coat, colour, and top coat are applied flawlessly. Technicians who experience consistent early lifting despite careful product application are typically making one of five specific prep mistakes that compromise adhesion before the gel system is even applied.
These prep errors create invisible barriers between the natural nail plate and the base coat. The gel appears well-adhered immediately after curing, but the compromised foundation fails under normal wear conditions. Water exposure, flexing, and minor impacts break the weak adhesion layer, and lifting spreads rapidly once it begins.
Understanding which prep mistake is causing your specific lifting pattern allows you to correct the error rather than blaming the gel system, the client’s nail condition, or the curing lamp. Most early lifting is preventable through proper prep technique, not through switching product brands or increasing cure times.
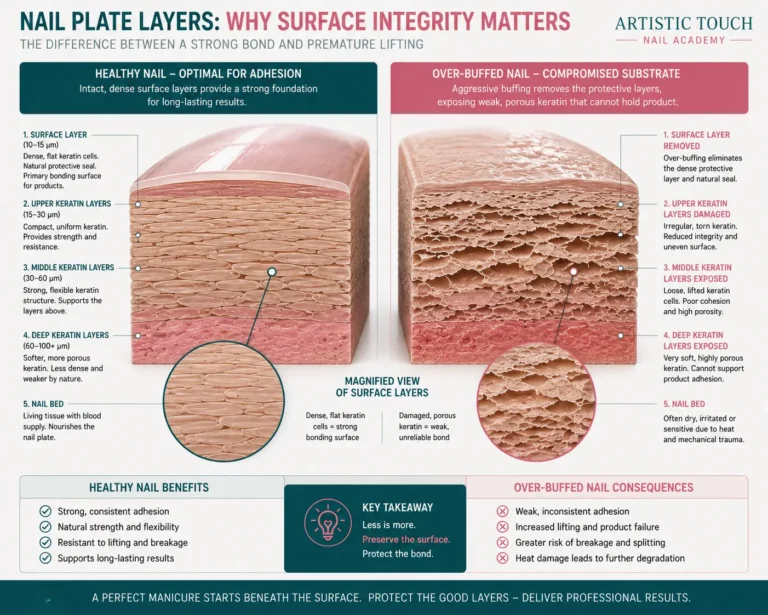
Mistake 1: Over-Buffing the Natural Nail Plate
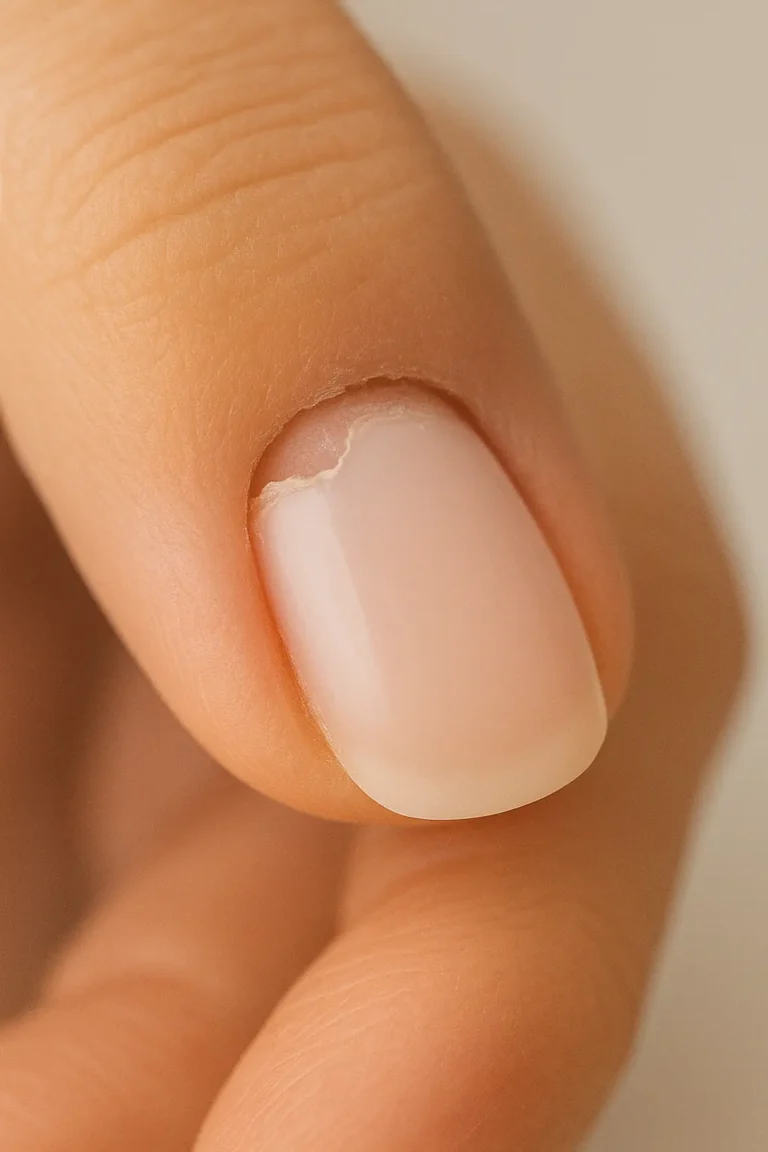
Over-buffing removes too many layers of the nail plate, creating a surface that is too thin and porous to support gel adhesion. The natural nail plate consists of multiple keratin layers. Light buffing removes only the outermost cells and natural oils, creating ideal texture for gel bonding. Aggressive buffing penetrates through the protective outer layers and exposes the softer, more porous intermediate layers that cannot hold gel product reliably.
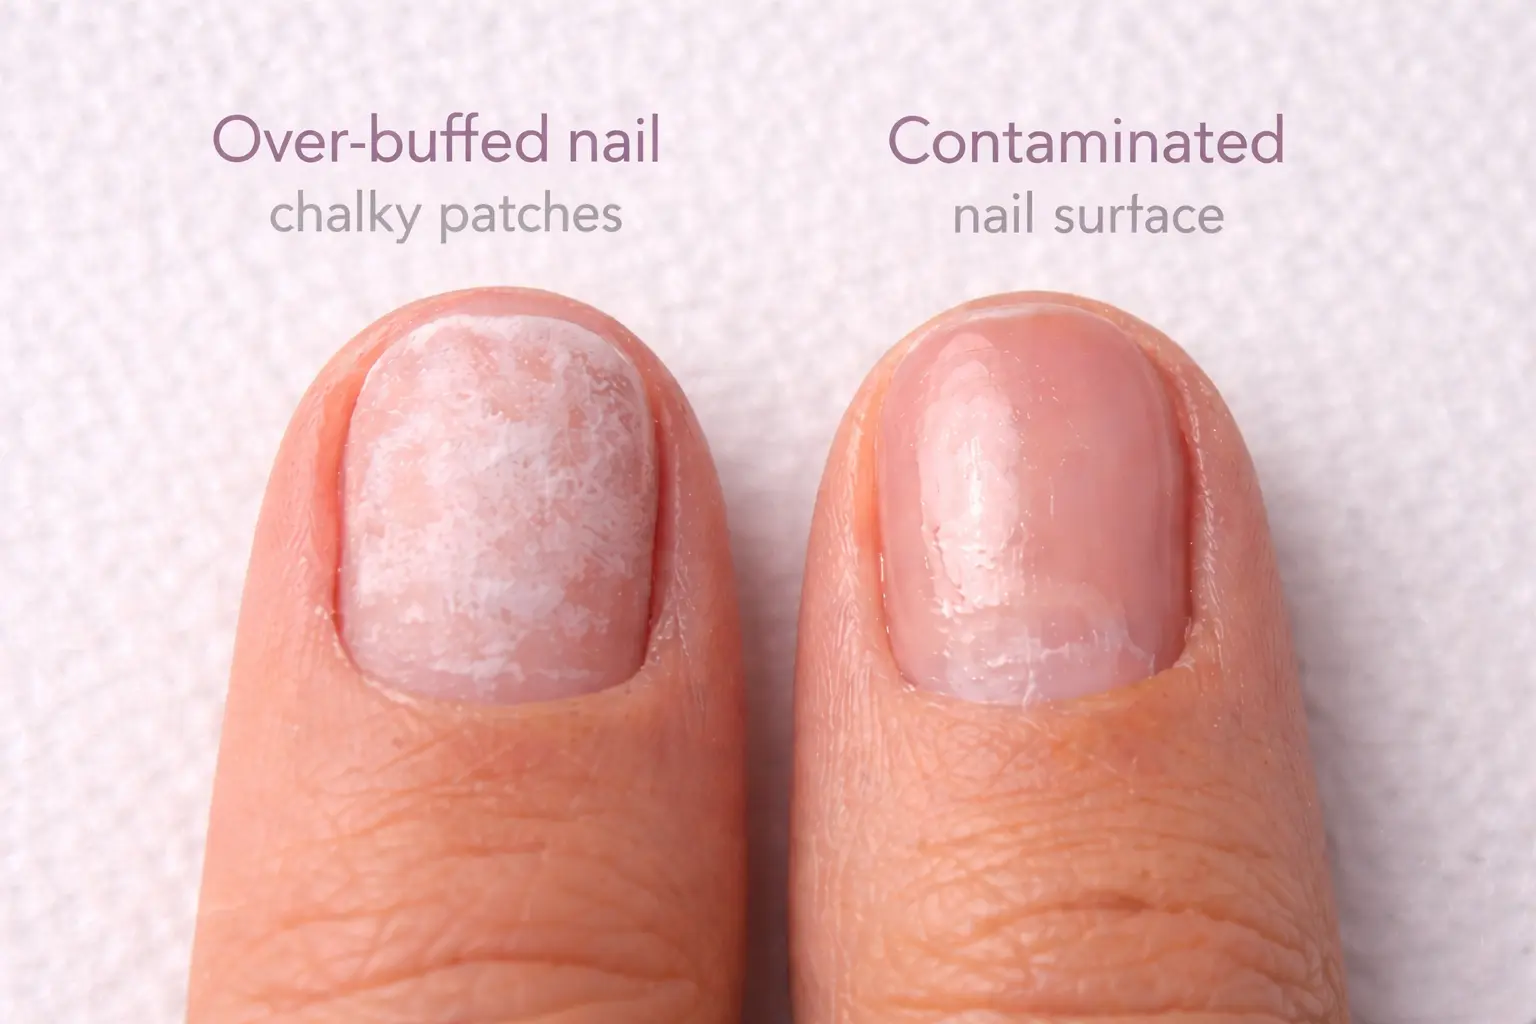
Signs of over-buffing include visible heat sensation during buffing, a nail plate that appears translucent or feels flexible after prep, and gel product that begins lifting within 48 hours across the entire nail surface rather than starting at specific stress points. Over-buffed nails may also show sensitivity to pressure or temperature after the service.
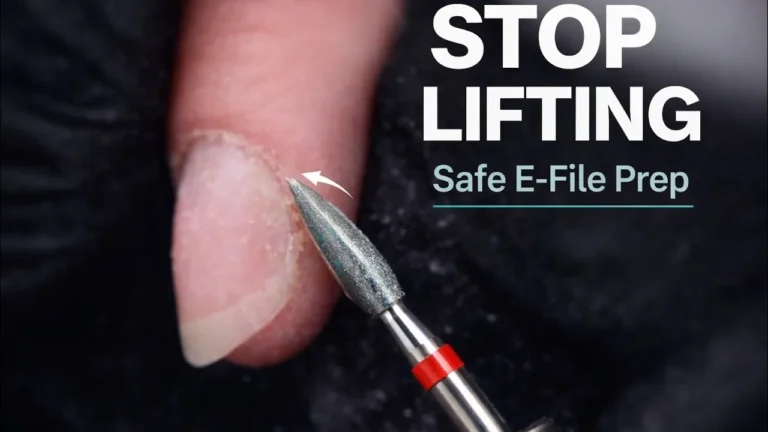
The correct buffing technique uses a 180-grit buffer or higher in gentle, sweeping motions across the nail plate. The goal is to remove shine and create microscopic texture, not to thin the nail or create visible scratches. The nail plate should appear matte but should not feel rough to the touch or show white patches indicating excessive removal of keratin layers.
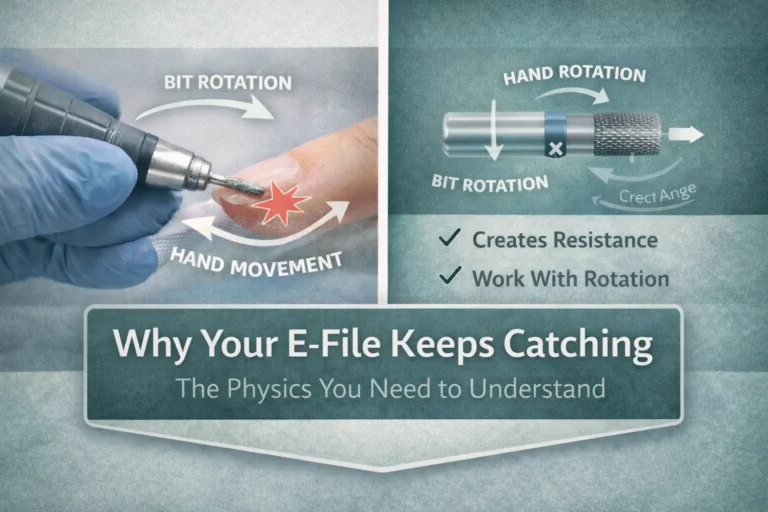
If you are using an e-file for buffing, the E-File Manicure course demonstrates safe bit selection, speed settings, and pressure control to prevent over-buffing whilst achieving proper surface preparation. E-file buffing requires precise technique to avoid generating heat or removing excessive nail plate material.
Mistake 2: Oil or Moisture Contamination
Oil or moisture left on the nail plate after buffing prevents dehydrator and primer from reaching the keratin surface. Contamination sources include hand lotion applied before the appointment, cuticle oil used during cuticle work, natural skin oils from touching the nail plate, and residual dust mixed with moisture from the client’s hands during filing or buffing.
Oil contamination is invisible to the naked eye but creates a barrier that repels gel base coat. Dehydrator applied over oil contamination evaporates without removing the underlying oil layer. Primer applied over this contaminated surface cannot bond to the nail plate. The result is gel product that lifts in irregular patches, often starting at areas where the client’s fingers touched the nail during the appointment.
The correct technique requires cleaning the nail plate with a lint-free wipe and isopropyl alcohol or dedicated nail cleanser after all filing, buffing, and cuticle work is complete. The cleaning step must occur immediately before dehydrator application. Cleaning the nail earlier in the appointment and then touching it during subsequent steps reintroduces contamination.
Avoid applying cuticle oil until after the gel service is complete. If cuticle oil is applied during the Russian Manicure or standard cuticle work, the nail plate must be thoroughly cleaned before moving to the gel application phase. The Russian Manicure course covers proper sequencing of cuticle oil application to prevent contamination whilst maintaining skin hydration during the service.
Mistake 3: Applying Dehydrator Too Early
Dehydrator loses effectiveness within two to five minutes after application as moisture from deeper nail plate layers migrates back to the surface. Applying dehydrator during cuticle work or immediately after buffing, then waiting several minutes before applying primer and base coat, eliminates the dehydrating effect. The nail surface appears dry but is no longer adequately prepared for gel adhesion.
This timing error is common when technicians attempt to work efficiently by completing all prep steps on multiple nails before beginning gel application. By the time base coat reaches the first prepared nail, the dehydrator applied five or ten minutes earlier has lost effectiveness. The result is lifting that begins at the free edge or sidewalls where moisture content is naturally higher.
The correct technique applies dehydrator, primer, and base coat in rapid succession on each nail individually. Complete the entire prep-to-base-coat sequence on one nail before moving to the next nail. This ensures that each nail receives base coat whilst the dehydrator and primer are still active on the surface.
If you are working on a full set of enhancements and cannot complete the entire hand rapidly, prepare and apply base coat to one or two nails at a time rather than preparing all ten nails before beginning product application. Gel systems that cure base coat in the lamp can be applied progressively without compromising adhesion, provided each nail’s prep sequence is completed rapidly before base coat application.
Mistake 4: Skipping or Misapplying Primer
Primer creates the chemical bond between natural keratin and gel base coat. Skipping primer entirely, applying primer to a contaminated surface, or allowing primer to dry completely before base coat application all produce the same result: gel product that appears well-adhered initially but begins lifting within three to seven days as the weak mechanical contact layer fails under wear stress.
Some technicians skip primer because they believe dehydrator alone is sufficient, or because the gel system’s marketing suggests that primer is optional. Whilst some modern gel systems include bonding agents in the base coat itself, most traditional gel systems require separate primer for reliable adhesion. Check your gel brand’s technical specifications to verify whether primer is required for the specific system you are using.
Primer must be applied in a thin, even layer across the entire nail plate immediately after dehydrator has evaporated. Over-application creates a thick, tacky layer that interferes with base coat curing. Under-application leaves gaps in coverage where adhesion will fail. The primer layer should appear slightly glossy but should not pool at the cuticle area or sidewalls.
Base coat must be applied whilst primer is still active, typically within 60–90 seconds of primer application. If the primer has dried to a hard film before base coat application, the bonding opportunity is lost. Re-applying primer over dried primer does not restore effectiveness. If prep timing is interrupted, remove all product with cleanser and restart the dehydrator-primer-base coat sequence from the beginning.
Mistake 5: Touching the Prepared Surface
Touching the nail plate with fingers, brushes, or tools after dehydrator and primer application reintroduces oils, moisture, and debris that compromise adhesion. Even brief contact transfers skin oils that create invisible barriers on the prepared surface. This is one of the most common prep mistakes and one of the most difficult to identify because the contamination is not visible.
Common sources of post-prep contamination include adjusting the client’s hand position after prep is complete, steadying the finger by touching the nail surface whilst applying base coat, and wiping the nail with a lint-free pad to remove dust after primer application. Each contact point creates a small area of compromised adhesion that becomes a lifting initiation site during wear.
The correct technique positions the client’s hand before beginning the dehydrator step and does not reposition fingers until after base coat is cured. Hold the finger by the sides or underside of the fingertip, never by placing pressure on the nail plate itself. If dust or debris lands on the prepared surface after primer application, use a clean, dry brush to lift it away rather than wiping with a pad that might deposit lint or oils.
Train yourself to work without touching prepared surfaces by practising hand positioning and brush control on practise hands before implementing the technique on clients. Muscle memory develops with repetition, and avoiding surface contact becomes automatic once the correct positioning is established.
⚠️ Over-Buffing Damage
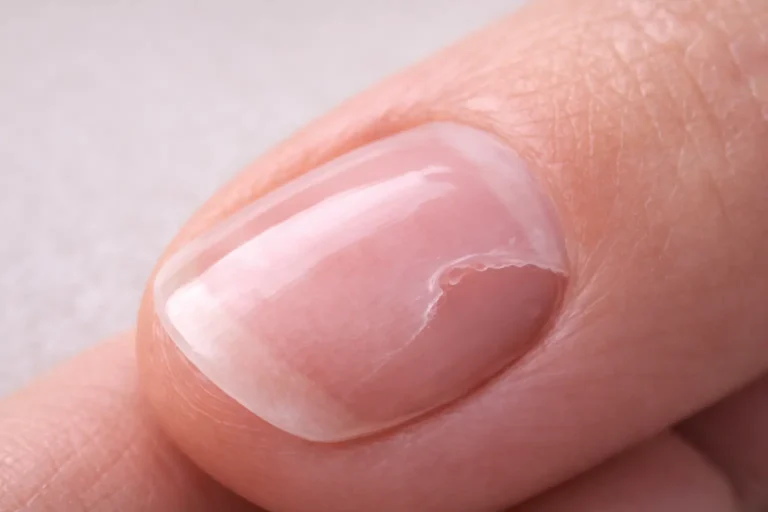
Over-buffed nails become thin, weak, and prone to splitting or cracking. Once the nail plate is damaged by excessive buffing, it cannot be repaired—only grown out. Clients with repeatedly over-buffed nails may develop long-term nail health problems including chronic lifting, sensitivity, and difficulty growing nails beyond the fingertip. Always use the minimum buffing required to remove shine. If your gel is lifting despite light buffing, the problem is likely contamination or timing, not insufficient surface texture. Check your contraindications before buffing clients with thin or damaged nail plates.
Why Technique Prevents Lifting
Each of these five prep mistakes creates a specific adhesion failure pattern. Over-buffing causes full-surface lifting within 48 hours. Contamination causes irregular patch lifting. Early dehydrator application causes free edge and sidewall lifting. Skipped primer causes progressive lifting starting at stress points. Surface contact causes small lifting spots that spread rapidly.
The Nail Prep Course demonstrates the correct technique for each prep step and shows you how to identify which mistake is causing your specific lifting pattern. The course includes close-up demonstrations of buffing pressure, contamination prevention, timing protocols, and hand positioning techniques that eliminate post-prep surface contact.
Stop Gel Service Lifting
The Nail Prep Course teaches you how to identify and correct the five most common prep mistakes that cause early lifting. Includes troubleshooting guides, technique demonstrations, and timing protocols for reliable three-week wear time.
Nail Prep Course →Lifetime access • Self-paced learning • Start immediately • Access from anywhere
Frequently Asked Questions
How much buffing is too much for gel services?
Buffing is excessive when the nail plate feels warm during the process, appears translucent, or shows white patches indicating deep keratin removal. Use a 180-grit buffer or higher and apply light pressure in sweeping motions. The goal is to remove surface shine, not to thin the nail. The nail should appear matte but should not feel rough or show visible scratches.
Can I use hand sanitiser to clean nails before gel services?
No. Hand sanitiser often contains moisturisers, glycerine, or other additives that leave residue on the nail plate. Use isopropyl alcohol (70% or higher) or a dedicated nail surface cleanser designed for gel prep. Apply with a lint-free wipe and allow the surface to dry completely before proceeding with dehydrator application.
How long can I wait between primer and base coat?
Apply base coat within 60–90 seconds of primer application whilst the primer is still active on the surface. If primer has dried to a hard film, it has lost bonding effectiveness. Waiting longer than two minutes between primer and base coat significantly reduces adhesion strength and increases the risk of early lifting.
Why does gel lift only on some nails?
Inconsistent lifting across the same hand typically indicates prep contamination or timing errors on specific nails. The nails that lift are those where dehydrator was applied too early, where surface contact occurred after prep, or where primer was missed or applied incorrectly. Consistent technique across all ten nails produces consistent wear time. Isolated lifting points to isolated prep errors.
Should I buff natural nails before gel services?
Yes. Light buffing removes the natural shine and oils from the nail plate and creates microscopic texture that improves gel adhesion. Use a 180-grit or finer buffer with light pressure. Skip buffing only if the nail plate is already damaged, excessively thin, or shows contraindications that make buffing unsafe.
About the Author
Radina Ignatova
Professional Nail Expert | International Nail Educator
I am Radina Ignatova, a Professional Nail Expert since 2014 and International Nail Educator, based in Scotland, UK. I am the Founder of Artistic Touch Nail Training Academy and TheNailWiki.
At Artistic Touch Nail Training Academy, I provide structured professional online nail courses specialising in dual forms, gel systems, polygel application, advanced nail structure, E-File work and Russian Manicure, with a strong focus on professional salon safety. I continue to work actively in salon practice, ensuring that all education reflects real client scenarios and current industry standards.
My teaching philosophy is simple: I show real salon challenges, real mistakes and real performance testing, not just perfect demonstrations. This is how you develop genuine technical competence and become a confident, capable nail professional.
Every Artistic Touch course includes lifetime access, where I provide ongoing guidance and professional feedback.
Disclaimer: This content is for educational purposes only. Nail services should be performed by trained professionals following current hygiene and safety regulations. Always carry out a full client consultation and check for contraindications before performing any nail service.
About Artistic Touch Nail Training Academy
Artistic Touch Nail Training Academy delivers structured professional online nail education focused on practical skill development, professional standards and safe salon practice. All courses are available online worldwide.