Applying Dual Forms: Why Beautiful Designs Fail During Application
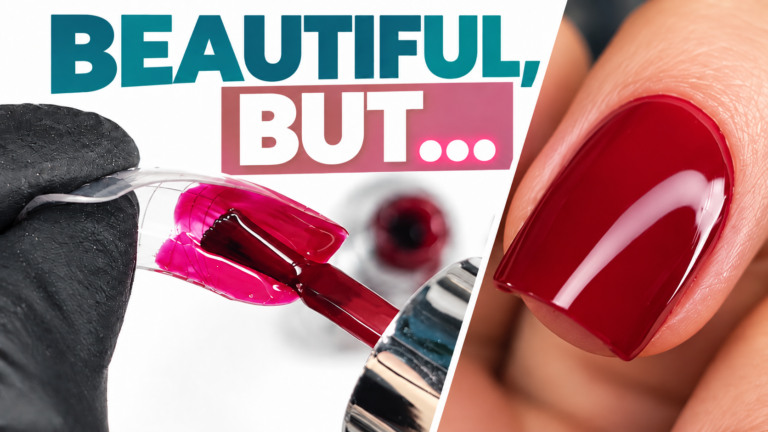
You have built a beautiful dual form design. The flowers are perfectly encapsulated. The glitter is arranged beautifully. The colours are balanced.
Then you apply it to the client’s nail and something goes wrong. The form lifts at the sides. The stress zone feels weak. Air pockets appear. Growth points become visible.
The problem is not the design. The problem is the structure underneath the design.
This article explains what happens during dual form application. Why structure matters more than beauty. How to build strength into your application so your designs last, not fail.
Why Dual Forms Fail After Beautiful Preparation
Dual forms fail during application because the structure underneath is insufficient. Weak stress zones, inadequate product under the smile line, improper flash curing, and poor reinforcement are the culprits. The dual form looks beautiful on its own. But application reveals structural weaknesses that were hidden during preparation.
Professional dual form application requires understanding where structure must sit, how to reinforce stress zones, when to flash cure, and how to support growth points. This is what separates designs that last from designs that fail.
Preparation is Not Application: The Critical Difference
Building a dual form on its own is different from applying it to a natural nail. When you build on the form, you see your design clearly. You can add product where you want it. You can create the aesthetic you envision.
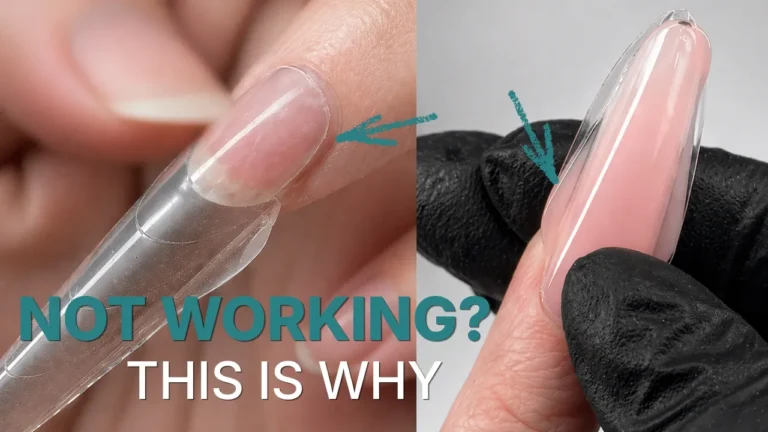
When you apply that same form to a natural nail, everything changes. The natural nail bed has contours. The smile line is at a specific depth. The growth points create weak areas. The nail bed meets the form at angles that create stress concentrations.
A design that looks perfect on the form can look weak or uneven once applied. The form might lift at the sides. Product might be too thick under the smile line, pushing the form up. Product might be too thin at the stress zone, creating weak spots that will fail.
This is why application skills are as important as design skills. You must understand what happens when the prepared form meets the natural nail, and how to adjust your product placement to support the form against these forces.
The Application Reality
A beautiful design is only successful if the application supports it. The structure underneath determines whether the design remains beautiful or fails within days.
Understanding Stress Zones: Where Failure Begins
The stress zone is where the natural nail ends and the dual form begins—the smile line. This area experiences constant stress from the movement and flexing of the nail plate.
When you apply product here, you are not simply filling space. You are creating a transition that must support the weight of the enhancement, the stress of daily movement, and the structural demands of the dual form above.
If the stress zone is weak, the enhancement fails here first. The smile line becomes a breaking point. The dual form separates from the natural nail. The client complains that the nails “broke at the base.”
The stress zone needs adequate thickness. This is where you concentrate product. Not evenly distributed—concentrated at the stress point, then thinning toward the cuticle.
The stress zone needs proper product choice. This is where builder gel provides its most critical support. Base coat is insufficient. The stress zone needs structural capacity.
The stress zone must be polymerised correctly. Flash curing is not sufficient. This area requires full curing to achieve maximum strength.
Preventing Forms From Lifting: Product Thickness Matters
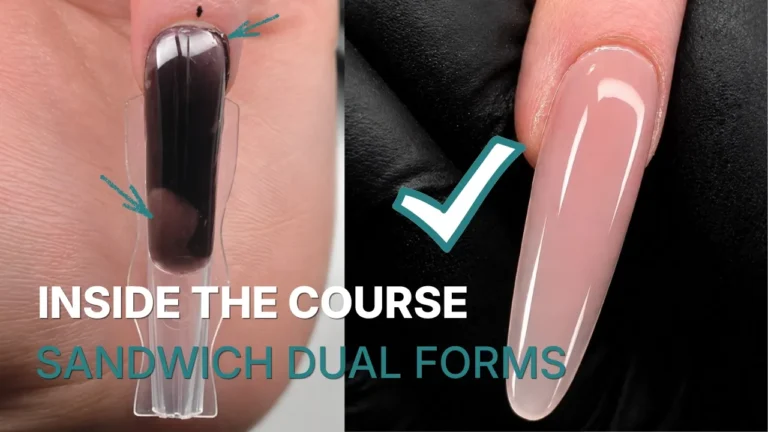
One of the most common failures is dual forms lifting at the growth points—the sides where the form meets the natural nail. This happens because too much product was placed underneath the form at the smile line.
When product polymerises underneath, it hardens and does not move. If you placed too much product, the hardened gel pushes up on the dual form, lifting it away from the natural nail. This creates visible gaps. Growth points become exposed. The nail looks smaller. Later, it breaks.
To prevent this, you must be extremely careful about product placement at the smile line. Less product is often better than more. You want just enough to support the form without pushing it up.
This is where experience matters. You learn to judge the precise amount of product needed for each nail shape, each form size, and each client’s nail bed depth. Too little and the form is unsupported. Too much and it lifts.
Flash Curing During Application: The Balancing Act
During application, you use flash curing to set the form in place. Flash curing holds the form so it does not move while you work on other nails. But flash curing does not fully polymerise the product.
Flash curing the cuticle area is essential. The cuticle zone is where the form connects to the nail. This area must be set enough that the form does not shift when you apply pressure or adjust it.
Partial curing is not strength. You are using flash curing as a working tool, not as final polymerisation. The product needs full curing in your nail lamp to achieve its maximum strength.
Underpolymerised product is weak. If you skip full curing and go straight to filing, your nails will be soft underneath the surface. They will fail under normal wear.
Many technicians rush this step. They flash cure the forms to position them, then move straight to refining without full curing. This is false efficiency. You are creating nails that look strong but are not.
⚠️ The Curing Mistake
Full curing is not optional. Flash curing is a working step. Full curing is the final step that creates strength. Without full curing, your encapsulated nails will fail.
Reinforcing the Design: Adding Structure After Application
Sometimes after you apply the form and cure it, you realise the stress zone is not strong enough. You see small gaps. You feel weak areas. The form does not feel as solid as it should.
This is normal. Encapsulated designs are complex. Sometimes you do not realise until you apply the form that additional reinforcement is needed.
The solution is to add extra product to the stress zones after the form is in place. Using the same builder gel, you build up additional layers at the weak points. You reinforce the growth points. You strengthen the smile line.
This is not a failure of your original preparation. This is professional adaptation. You assessed the nail after application, identified weak points, and reinforced them. This is what experienced technicians do.
Beginners try to skip this step. They think if the form is applied, it is done. It is not. Assessment and reinforcement after application are normal parts of professional dual form work.
The Smile Line Challenge: Balancing Coverage and Strength
The smile line is where the natural nail bed ends and the free edge begins. During application, you need to cover the natural nail bed so it is not visible through the French tip. But you also need to ensure the product does not push the form up.
This requires precision. You apply a thin layer of builder gel mixed with colour just before the smile line. This covers the visible nail bed. Then you apply the protective pink colour on top, with maximum thickness at the stress zone and gradually thinning toward the cuticle.
The key is thickness distribution. Thick where stress is concentrated. Thin everywhere else. This prevents the pushing-up effect while providing adequate coverage.
Removing Dual Forms: Technique Matters
After full curing, you must remove the dual forms carefully. If the form is stuck, you should not force it. Forcing can break the form or damage the enhancement beneath.
Clips help. A gentle clip applied after full curing helps lift the form slightly, making removal easier. The form should come off with minimal force.
If the form is stuck, the problem is usually that you applied product to the edge of the form, creating a seal. Gently break this seal with a small tool before attempting removal.
Once the form is off, clean the inhibition layer from both top and bottom. Inhibition layer is tacky and must be removed before refining. It will clog files and leave a sticky residue on the skin.
Refining the Russian Almond Shape: Minimal Filing Philosophy
Russian almond dual forms come pre-shaped. The goal during refinement is to maintain that shape while cleaning up edges and ensuring smoothness.
This is not the time to reshape the nails. You are refining the existing shape, not creating a new one. If you remove too much product, you lose the intended shape.
Use old files for refinement. Old files are duller and remove less product. You get a smoother result with less aggressive removal. This is especially important when working on pre-shaped forms.
Refine underneath carefully. The underneath of the nail (the nail bed parallel) should be smooth. You are checking for smoothness and cleanliness, not reshaping.
Minimal refinement equals better results. The less you file, the more product you retain. More product means more structural support.
Air Pockets and Small Imperfections: Repair Strategies
Sometimes after removing the form, you see small air pockets where the design was applied. These are small voids where product did not fully surround a flower or glitter piece.
You can repair small air pockets by carefully drilling out the void with a flame bit, then filling with clear builder gel. This is a minor repair that professional technicians do regularly.
Small bubbles at the cuticle can be gently drilled with a fine bit and left (they will be covered by the cuticle when hair grows). Or they can be filled with product.
The goal is not perfection. The goal is durability. If the air pocket does not affect structure, it does not need repair. If it affects strength, repair it.
Top Coat: Creating Shine and Protecting the Design
The final step is top coat application. Top coat seals the design and creates the final shine. This is where your encapsulated design truly comes alive.
Use thin layers. Multiple thin layers of top coat are better than one thick layer. Thin layers cure completely and do not run onto the cuticle.
Flash cure between coats if needed. If you are applying multiple layers, flash curing between them ensures each layer sets before the next is applied.
Apply underneath for depth effect. For an aquarium effect, apply top coat underneath the nail (the nail bed parallel) for extra shine and depth that makes the design pop.
Full cure the final coat. The top coat must be fully polymerised for maximum clarity and shine.
Advanced Technique: Not for Beginners
Encapsulated dual form application is an advanced technique. This is not something you should attempt if you are new to nail work.
You must understand:
Dual forms fundamentally—how they fit, what shapes work for different nails, how to assess them for structural flaws
Product behaviour—how different products polymerise, how much thickness is appropriate, what reinforcement means
Stress zones—where they occur on different nail shapes, how much support they need, what fails when they are weak
Colour application—how to apply pink smoothly, how to blend colours, how to create professional coverage
If you are not comfortable with these fundamentals, start with the free guide. Then progress to the professional course before attempting advanced encapsulation.
About Radina Ignatova and Her Teaching Philosophy
About the Author
Radina Ignatova
Professional Nail Expert | International Nail Educator
I am Radina Ignatova, a Professional Nail Expert since 2014 and International Nail Educator, based in Scotland, UK. I am the Founder of Artistic Touch Nail Training Academy and TheNailWiki.
At Artistic Touch Nail Training Academy, I provide structured professional online nail courses specialising in dual forms, gel systems, polygel application, advanced nail structure, E-File work and Russian Manicure, with a strong focus on professional salon safety. I continue to work actively in salon practice, ensuring that all education reflects real client scenarios and current industry standards.
My teaching philosophy is simple: I show real salon challenges, real mistakes and real performance testing, not just perfect demonstrations. This is how you develop genuine technical competence and become a confident, capable nail professional.
Every Artistic Touch course includes lifetime access and access to a dedicated student support group, where I provide ongoing guidance and professional feedback.
Master Application and Structure
The Ultimate Dual Forms Online Course covers preparation, application, stress zone reinforcement, and advanced troubleshooting. Learn everything you need to create durable encapsulated designs.
Enrol in the Professional Course →Lifetime access • Self-paced • Advanced structure focus • Real salon application
Frequently Asked Questions
How much product should I place under the smile line?
This depends on the form, the nail shape, and the smile line depth. As a general rule: enough to support the form without lifting it. If in doubt, use less. You can always add more. But if you add too much, you will have to remove it, which is more difficult.
What is the difference between flash curing and full curing?
Flash curing (quick cure) sets product quickly so you can continue working. Full curing (placing nails in lamp for the recommended time) fully polymerises the product for maximum strength. Flash curing is a working tool. Full curing is essential for durability.
Can I add reinforcement after the form is applied?
Yes. Adding reinforcement after application is normal and professional. You assess the nail after applying and curing the form, identify weak points, and strengthen them. This is what experienced technicians do regularly.
What should I do if the dual form will not come off?
Do not force it. Gently break the seal at the edges using a small tool. Apply a gentle clip to help lift the form. If it still will not come off, you have probably sealed it with product. Gently drill around the edges to break the seal, then try again.
Should I file a lot after removing the form?
No. Minimal filing is best. The form is pre-shaped. You are refining the shape, not recreating it. Excessive filing removes product and weakens the structure. Use old files to minimise removal and keep more product for strength.
Start With the Free Guide
Before attempting advanced application techniques, ensure you understand how to assess, fit, and choose dual forms correctly. The free guide is the foundation.
Free Course: How to Pick Dual Forms →Disclaimer: This content is for professional nail technician education purposes only. Nail services should be performed by trained professionals following current hygiene and safety regulations. Always carry out a full client consultation and check for contraindications before performing any nail service. Encapsulated dual form applications are advanced techniques requiring proper understanding of dual form systems, structural support, and application methodology.
About Artistic Touch Nail Training Academy
Artistic Touch Nail Training Academy delivers structured professional online nail education focused on practical skill development, professional standards and safe salon practice. All courses are available online worldwide with lifetime access and ongoing student support.