How to Fix Hollow Gaps Under BIAB Dual Forms: Real Salon Repair
Quick Answer: What Causes Hollow Gaps Under BIAB Dual Forms?
Hollow gaps under BIAB dual form overlays are caused by insufficient product inside the dual form, incorrect pressure during placement, downward-growing natural nails, or improper flash curing. Air pockets left underneath can lead to lifting and structural failure if not repaired correctly.
How to fix it: Carefully file through the hollow area using a sharp-tipped drill bit, add fresh BIAB to fill the void, cure properly, then refine the surface to restore structural integrity.
Prevention: Use adequate product volume, apply even pressure when placing forms, check underneath before curing, and ensure correct flash curing position — especially when filming or working with overhead lighting that restricts movement.
Learn Correct Dual Form Technique — No-File BIAB Masterclass →
Why This Mistake Matters — Even After 12 Years
Even with more than 12 years of professional salon experience, I made a mistake during this BIAB dual form overlay that created a hollow gap underneath the product. This is not a hypothetical scenario designed for teaching purposes — this is a real error that occurred during an actual client appointment, and I am showing you exactly what happened, why it happened, and how I corrected it.
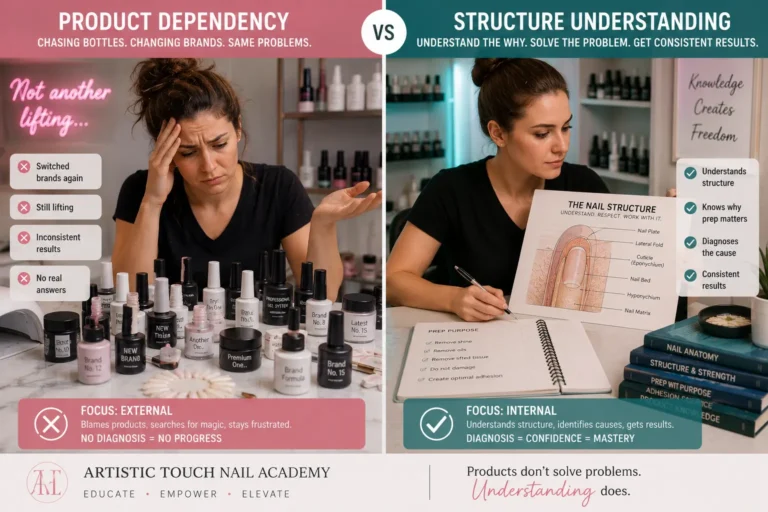
Most nail educators only show you perfect results. Every demonstration looks flawless. Every technique is executed without errors. That content might look impressive on Instagram — but it does not prepare you for real salon work. I show real salon challenges, real mistakes and real performance testing, not just perfect demonstrations. This is how you develop genuine technical competence and become a confident, capable nail professional.
The mistake occurred because I did not apply enough product into the dual form, and the client’s natural nail had a slight downward growth pattern — meaning it curved slightly downwards rather than growing straight or upwards. This subtle curve was not immediately visible during sizing, and combined with insufficient product volume, it created an air pocket underneath the BIAB overlay once the form was removed.
This video demonstrates exactly how to identify hollow gaps, why they form, and how to repair them safely without compromising the natural nail or the structural integrity of the overlay. Understanding this repair technique is essential for any nail technician working with dual forms in real salon conditions — because mistakes happen to everyone, and knowing how to correct them quickly and professionally is what separates competent technicians from beginners who panic when something goes wrong.
What Causes Hollow Gaps Under BIAB Dual Forms
Hollow gaps — also called air pockets or voids — form underneath BIAB dual form overlays when the product does not make full contact with the entire surface of the natural nail plate. There are several common causes, and in this particular case, multiple factors contributed to the problem.
Cause 1 — Insufficient Product Volume
The primary cause in this video was that I did not place enough BIAB inside the dual form before pressing it onto the natural nail. When product volume is insufficient, there is not enough gel to fill the entire space between the form and the nail plate — particularly in areas where the nail curves or has a natural arch. This leaves a void underneath that becomes visible once the dual form is removed.
Cause 2 — Downward-Growing Natural Nails
This client’s natural nail had a slight downward growth pattern — meaning the nail curves gently downwards from the cuticle towards the free edge rather than growing flat or upwards. This type of nail shape is sometimes referred to as a “hooked nail” when the curve is more pronounced. The downward curve was subtle and not immediately obvious during the initial sizing stage, but it became a contributing factor once the dual form was placed.
When a downward-growing nail is paired with insufficient product, the natural curve of the nail plate creates an area where the gel cannot reach — leaving a hollow space underneath. This is a biomechanical issue, not purely a technique error, and it demonstrates why understanding natural nail behaviour is essential when working with dual forms.
Cause 3 — Incorrect Pressure During Placement
In the video, you can see that when I pressed the dual form onto the nail, I was working under an overhead filming lamp. This lamp restricted my normal movement and prevented me from seeing clearly how much pressure I was applying and whether the form was sitting flush against the nail plate. The client was also holding the flash cure lamp, and because she was unfamiliar with the sensor, she was not curing in the correct position — which meant I could not see underneath the form as I normally would.
These are the kinds of real salon challenges that occur when you are filming, working quickly between back-to-back appointments, or adapting to equipment that is not part of your usual setup. They are not dramatic failures — they are small miscalculations that compound into noticeable issues if not corrected immediately.
⚠️ Why Hollow Gaps Lead to Lifting
Air pockets underneath the product create structural weakness. When the client uses their hands — typing, cleaning, applying pressure to the nail — the unsupported area flexes differently than the rest of the overlay. This flexing breaks the adhesion bond between the product and the natural nail, causing lifting to begin at the edges of the hollow area. Left unrepaired, the lifting spreads outwards and the entire overlay can separate from the nail plate within days.
Step-by-Step: How to Repair a Hollow Gap Under BIAB
Once I identified the hollow gap — which was visible as a soft area when I pressed gently on the BIAB overlay — I followed a structured repair process to restore the structural integrity of the nail without causing damage to the natural nail underneath.
Step 1 — Identify the Hollow Area
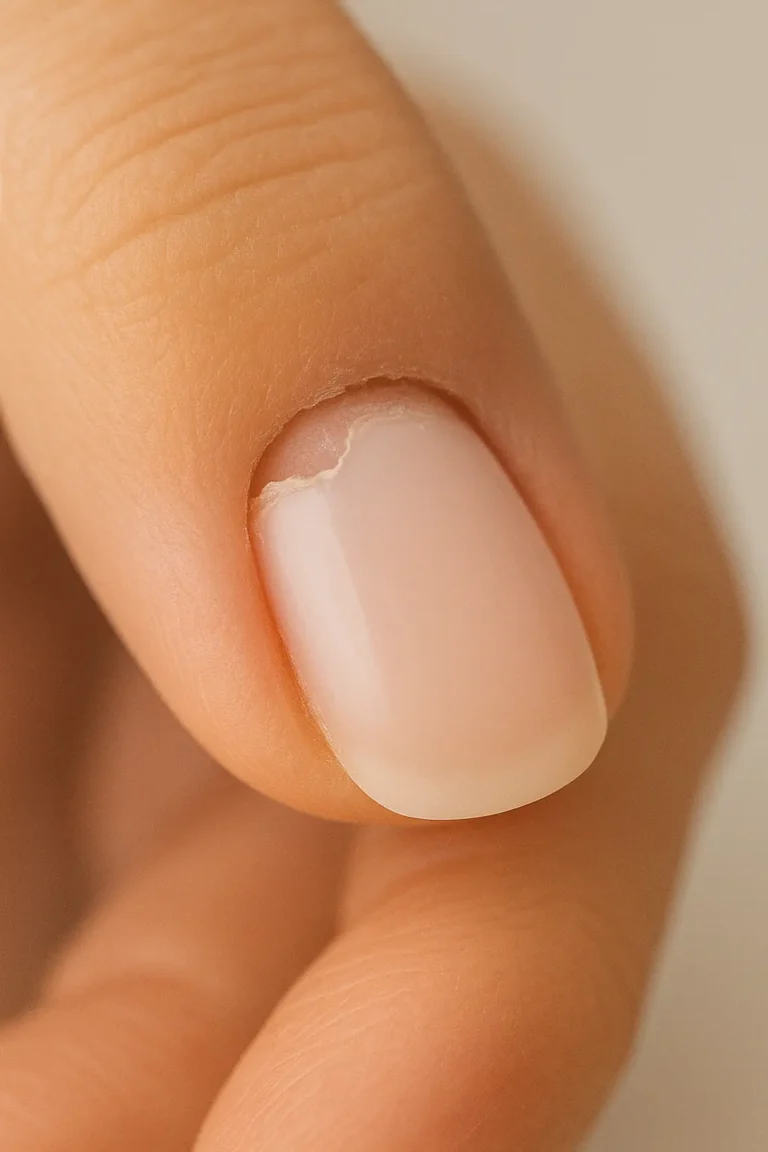
The BIAB felt soft when I pressed it gently with my finger, and I could see a faint gap underneath the pink product. This is easier to identify on lighter colours — with darker or opaque gels, you may need to rely on tactile feedback by pressing gently on the surface and feeling for areas that flex or give under pressure.
Step 2 — File Through the Hollow Product
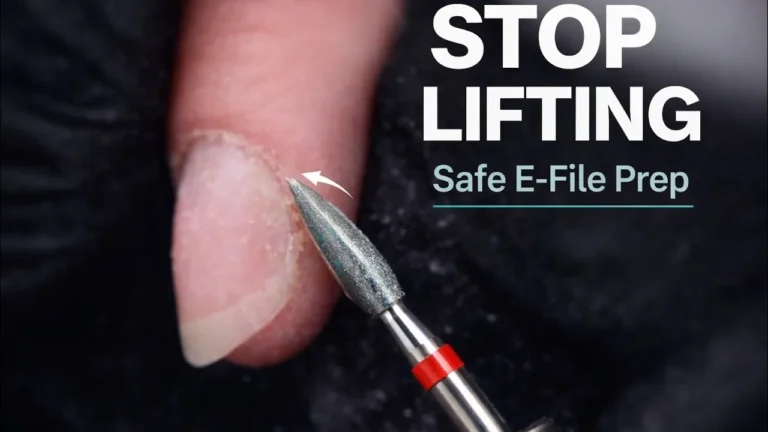
Using a sharp-tipped carbide drill bit, I carefully filed through the BIAB overlay directly into the hollow area. The goal here is to break through the top layer of product and expose the void underneath so that it can be filled properly. You must work carefully to avoid filing through to the natural nail plate itself — stop as soon as you reach the hollow space.
Because the product underneath the void will likely have an inhibition layer — the sticky, uncured surface left on gel after curing — this inhibition layer can transfer onto your drill bit and clog it. You may need to wipe the bit clean with IPA during this step to maintain cutting efficiency.
Step 3 — Check for Additional Voids
Once the first hollow area was opened, I used my finger to press gently around the surrounding product to check whether there were any additional air pockets. Because the overlay was pink, it was difficult to see all voids visually — tactile checking is essential. In this case, I identified one primary void that required repair.
Step 4 — Prepare a New Dual Form
Rather than attempting to fill the void freehand, I selected the same size dual form that I had used during the original application. This allows me to rebuild the structure with the correct shape and support, ensuring that the repaired area matches the rest of the overlay in thickness and curvature.
Step 5 — Add More Product This Time
I applied a slightly more generous amount of BIAB into the dual form than I had used during the first attempt. This ensured that when the form was pressed onto the nail, there would be enough product to fill the entire space — including the natural curve created by the downward growth pattern.
As I pressed the form into position, I could see small bubbles appearing on the left side of the nail — visible where I was applying pressure with my finger. This indicated that there was still not quite enough product in that specific area. Rather than continuing and hoping it would work, I pulled the form off immediately, added a small additional amount of gel, and repositioned the form.
Pro Tip: Do Not Ignore Bubbles During Placement
If you see bubbles appearing as you press the dual form onto the nail, it means there is insufficient product or uneven pressure. Do not flash cure and hope it will work — pull the form off, add more product, and reposition. Correcting it during placement takes seconds. Repairing it afterwards takes minutes and wastes product.
Step 6 — Flash Cure Correctly
Once the dual form was correctly positioned with adequate product, the client flash cured the cuticle area using the handheld lamp. However — and this is visible in the video — she cured the entire nail rather than just the cuticle zone. This is not the client’s fault; she was unfamiliar with the process and was doing her best under challenging conditions.
When the entire nail is cured during the flash cure stage, some product can seep out underneath the free edge and cure in that position, creating small amounts of bulk underneath. Ideally, you flash cure only the cuticle area to set the product in place, then turn the hand over to check underneath and remove any excess gel before placing the hand into the full lamp for the complete cure.
Step 7 — Refine the Repaired Area
After removing the dual form and wiping off the inhibition layer, I used my carbide drill bit to refine the free edge and remove any product that had cured outside the intended shape. I then used a manual file to smooth the entire nail, taking off any bulk and blending the repaired area seamlessly into the rest of the overlay.
Because I had to press the dual form skin quite firmly during placement to release all product from the sides, I was careful not to damage the surrounding skin or the nail itself during this refinement stage. The nail shape was finished as a square with slightly emphasised corners — the Instagram square.
Want to Avoid These Mistakes in the First Place?
The No-File BIAB Dual Forms Masterclass teaches correct product placement, form sizing for different nail shapes, flash curing technique, and how to identify structural issues before they become problems.
Learn the technique properly from the start — structured professional education that prevents errors rather than just teaching you how to fix them.
How to Prevent Hollow Gaps in Future Applications
Prevention is always more efficient than repair. These are the specific adjustments I have made to my dual form technique following this experience — practical changes that reduce the likelihood of hollow gaps forming in the first place.
1. Use More Product Than You Think You Need
When working with BIAB or builder gel in dual forms, it is better to have slightly too much product than too little. Excess product can be wiped away before curing or filed off afterwards. Insufficient product creates structural voids that require complete repair. Adjust your product volume upwards, particularly when working with downward-growing or highly curved natural nails.
2. Assess Natural Nail Growth Direction During Sizing
Look at each natural nail from the side profile during the sizing stage. Does it grow flat? Does it curve upwards? Does it curve downwards? Downward-growing nails require additional attention during dual form placement because the natural curve creates areas where product may not reach. Knowing this in advance allows you to adjust product volume and pressure accordingly.
3. Always Check Underneath Before Flash Curing
After placing the dual form onto the nail, turn the hand over and look underneath the free edge before you flash cure. Remove any excess product that has seeped out beyond the form, but leave the free edge itself intact — this provides the correct underside structure. Checking underneath also allows you to see whether the product is sitting flush against the nail plate or whether there are visible gaps.
4. Train Clients on Flash Cure Lamp Positioning
If your client is holding the flash cure lamp, take the time to show them exactly where to position it and how the sensor works. In this video, the client was curing the entire nail rather than just the cuticle area, and she was holding the lamp at an angle that prevented me from seeing how the dual form was sitting. A few seconds of clear instruction at the beginning of the appointment prevents these issues from occurring.
5. Adjust Your Setup When Filming or Using Overhead Lighting
Overhead filming lamps or ring lights can restrict your movement and visibility during dual form placement. If you are filming your work, position your lighting at a height that allows you to move your hands freely and to see underneath the nail as you work. The lamp I used in this video is not part of my regular salon setup — it is only present during filming — and it contributed directly to the difficulty I experienced during this application.
Why I Show You Mistakes — Not Just Perfection Like Most Educators
I have been a professional nail technician since 2014. I teach dual form application in my online masterclasses. I work in a busy salon environment with back-to-back appointments. And I still make mistakes — because that is what happens in real salon practice.
Most nail educators only show you perfect demonstrations. Every application looks flawless. Every nail is symmetrical. Every technique is executed without a single correction. That type of content looks impressive — but it does not prepare you for actual salon work, where equipment restricts your movement, clients ask questions mid-application, and you are working to a schedule with another appointment starting in fifteen minutes.
I show real salon challenges, real mistakes and real performance testing, not just perfect demonstrations. This is how you develop genuine technical competence and become a confident, capable nail professional.
That is why I show you the errors. I do not hide them. I do not edit them out. I do not pretend they did not happen. Because when you encounter the same problem in your own salon — and you will — you need to know what it looks like, why it occurred, and exactly how to fix it without panic.
The difference between experienced professionals and beginners is not that experienced professionals never make errors. The difference is that we recognise errors immediately, we understand why they occurred, and we know how to correct them quickly without causing additional damage or wasting time.
This video is intentionally unedited. You can see me working quickly because I had another client waiting. You can see the challenges created by filming equipment. You can see the client struggling with the flash cure lamp sensor. You can see me making the decision to pull the form off and start again when I noticed bubbles. These are real salon conditions — not staged demonstrations designed to look effortless.
If you are a student or a newly qualified nail technician, I want you to understand that making mistakes does not mean you are incompetent. It means you are human. What matters is developing the skill to identify problems, understand their causes, and apply effective solutions. That is what genuine technical competence looks like — and that is what you learn when mistakes are shown honestly, not hidden behind perfect Instagram content.
Frequently Asked Questions About Hollow Gaps Under BIAB Dual Forms
How do you know if there is a hollow gap under your BIAB overlay?
Press gently on the surface of the cured BIAB with your finger. If the product feels soft, flexible, or gives under pressure in a specific area, there is likely a void underneath. On lighter or translucent products, you may also be able to see the gap visually as a shadow or discolouration beneath the surface. Hollow areas will eventually lead to lifting if left unrepaired.
Can you repair a hollow gap without removing the entire overlay?
Yes. You can repair a hollow gap by filing carefully through the top layer of product to expose the void, then filling it with fresh BIAB or builder gel and curing properly. This method preserves the rest of the overlay and avoids the need to remove and reapply the entire nail. The repaired area is then filed smooth and blended into the surrounding structure.
Why do downward-growing nails cause hollow gaps more often?
Downward-growing nails — also called hooked nails — curve downwards from the cuticle to the free edge rather than growing flat or upwards. This natural curve creates a gap between the nail plate and the dual form if insufficient product is used. The gel cannot reach into the curved area, leaving a void underneath. These nail types require more product volume and careful pressure during dual form placement to ensure full coverage.
What happens if you leave a hollow gap unrepaired?
Unrepaired hollow gaps create structural weakness in the overlay. When the client uses their hands, the unsupported area flexes differently than the rest of the nail, breaking the adhesion bond and causing lifting to begin at the edges of the void. The lifting spreads outwards over time, and the entire overlay can separate from the natural nail within days. Hollow gaps must be repaired as soon as they are identified to prevent product failure.
Why does the inhibition layer clog drill bits during hollow gap repair?
When you file through the top layer of cured BIAB to expose a hollow area underneath, the product inside the void often has an inhibition layer — the sticky, uncured surface left on gel after curing. This sticky layer transfers onto your drill bit during filing and clogs the cutting surface, reducing efficiency. Wipe your drill bit clean with IPA during the repair process to maintain proper cutting performance.
Should you check underneath the nail before flash curing dual forms?
Yes. Always turn the hand over and check underneath the free edge after placing the dual form and before flash curing. Remove any excess product that has seeped out beyond the form, but leave the free edge structure intact. Checking underneath also allows you to see whether the product is sitting flush against the nail plate or whether there are visible gaps that need to be addressed before curing.
Can filming equipment or overhead lighting cause dual form application problems?
Yes. Overhead filming lamps or ring lights can restrict your normal hand movement and limit your visibility during dual form placement. If the lighting is positioned too low, it prevents you from seeing underneath the nail as you work and can interfere with your ability to hold the e-file or apply even pressure. Position filming equipment at a height that allows free movement and clear visibility of the work area.
Master Dual Form Application Without the Guesswork
The No-File BIAB Dual Forms Masterclass teaches correct product placement, form sizing for different nail shapes, structural integrity, and professional troubleshooting — so you can avoid these mistakes from the start.
View the No-File BIAB Dual Forms Masterclass →About the Author
Radina Ignatova
Professional Nail Expert | International Nail Educator
I am Radina Ignatova, a Professional Nail Expert since 2014 and International Nail Educator, based in Scotland, UK. I am the Founder of Artistic Touch Nail Training Academy and TheNailWiki.
At Artistic Touch Nail Training Academy, I provide structured professional online nail courses specialising in dual forms, gel systems, polygel application, advanced nail structure, e-file work and Russian manicure, with a strong focus on professional salon safety. I continue to work actively in salon practice, ensuring that all education reflects real client scenarios and current industry standards.
My teaching philosophy is simple: I show real salon challenges, real mistakes and real performance testing, not just perfect demonstrations. This is how you develop genuine technical competence and become a confident, capable nail professional.
Every Artistic Touch course includes lifetime access, a certificate of completion and access to a dedicated student support group, where I provide ongoing guidance and professional feedback.
Disclaimer: This content is for educational purposes only. Nail services should be performed by trained professionals following current hygiene and safety regulations. Always carry out a full client consultation and check for contraindications before performing any nail service.
About Artistic Touch Nail Training Academy
Artistic Touch Nail Training Academy delivers structured professional online nail education focused on practical skill development, professional standards and safe salon practice. All courses are available online worldwide.